The ZenSportsia public mint is now open! Click here to get your very own ZenSportsian NFT.
Creating a new Web 3 cryptocurrency / NFT wallet that isn’t managed by a centralized exchange (like Coinbase) may seem like a daunting task if you’re new to the crypto or NFT space. Thankfully, the ZenSports and ZenSportsia teams are here to help you out! Below is a step by step guide on how to create a wallet using MetaMask, which is a Web 3 wallet provider that will allow you to receive and store cryptocurrencies and NFT’s yourself. By using a Web 3 wallet like MetaMask, you’ll officially own the private keys to access your wallet from anywhere without the permission of a centralized third party.
NOTE: a Web 3 wallet with MetaMask will only allow you to store EVM compatible coins and NFT’s like Ethereum. It will not allow you to store Bitcoin. For a Bitcoin wallet, check out the Exodus Wallet.
Questions? Just tag us on Twitter or join our Discord channel!
Step 1
Go to the MetaMask website at https://metamask.io/
Step 2
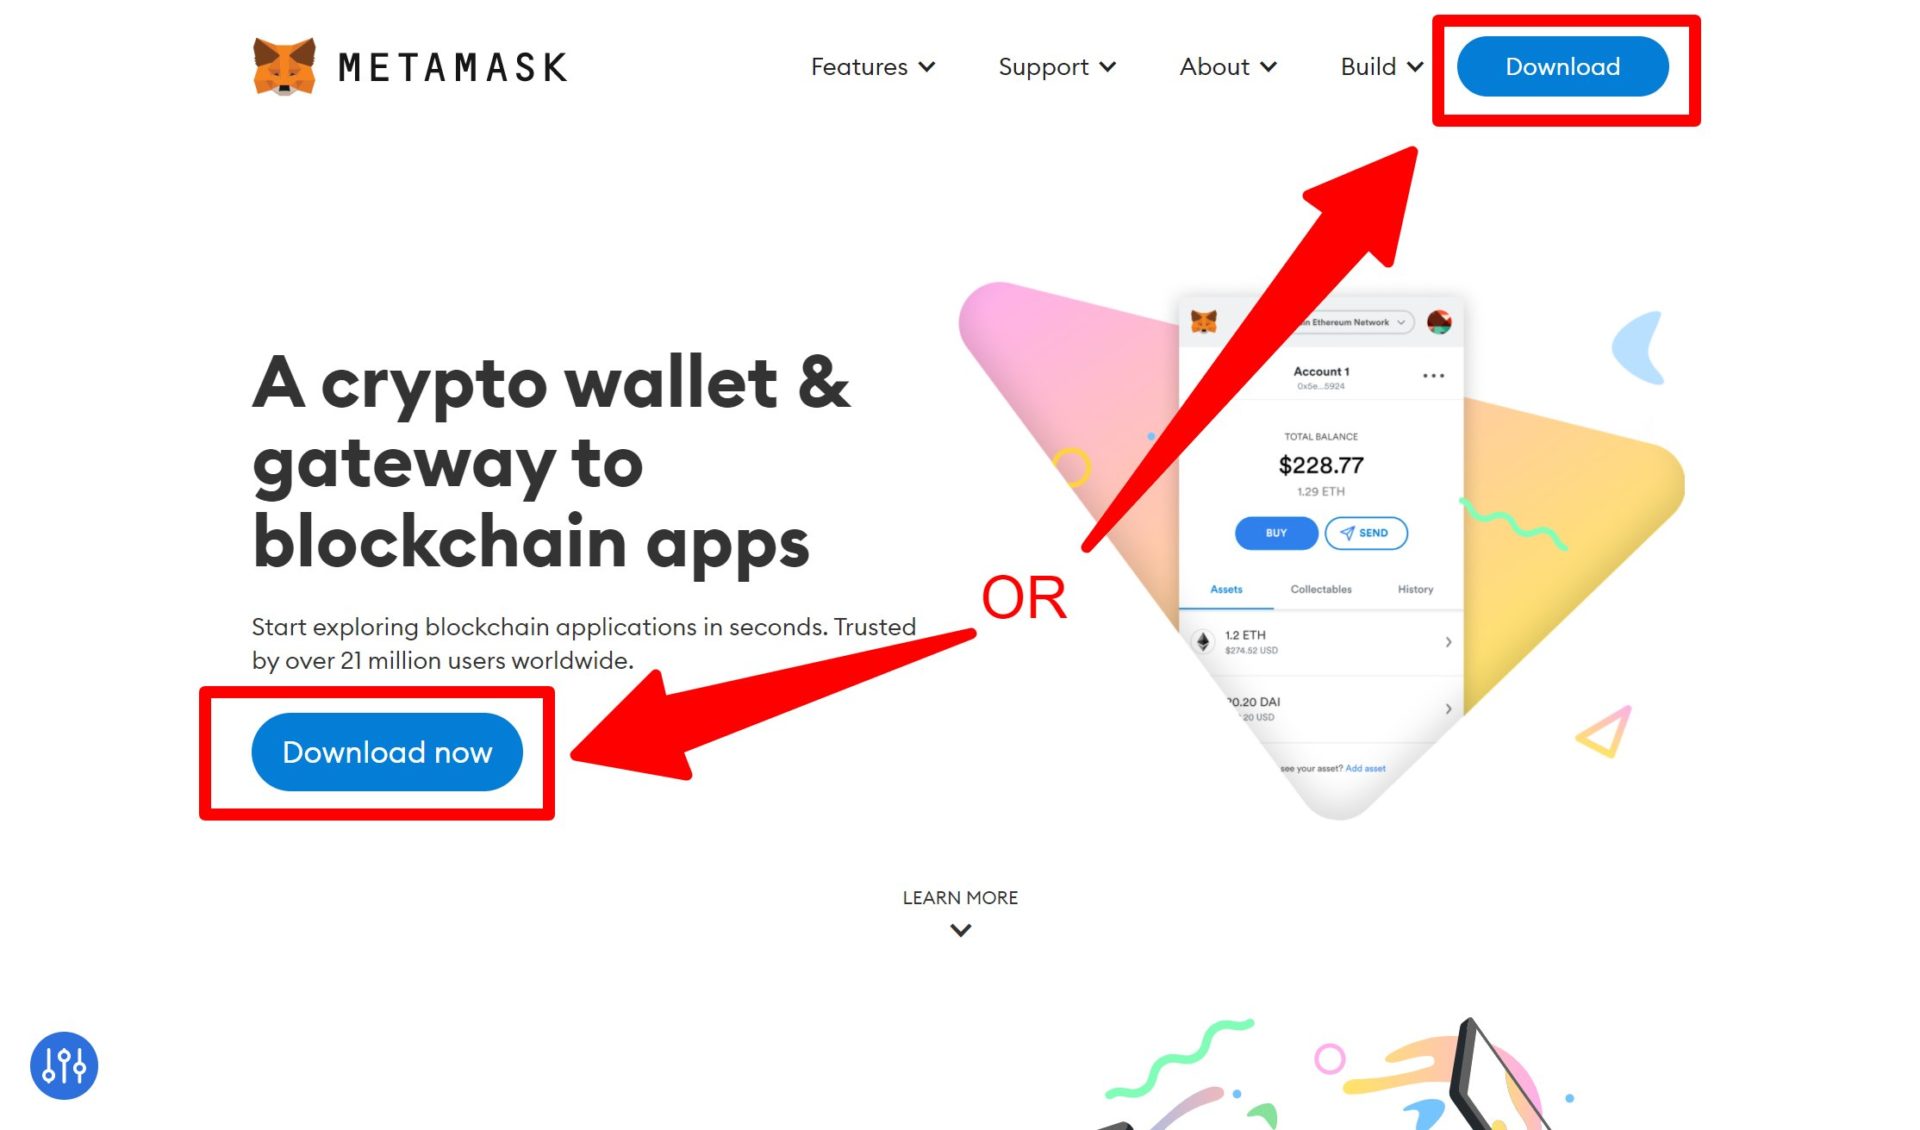
Click “Download”:
Step 3
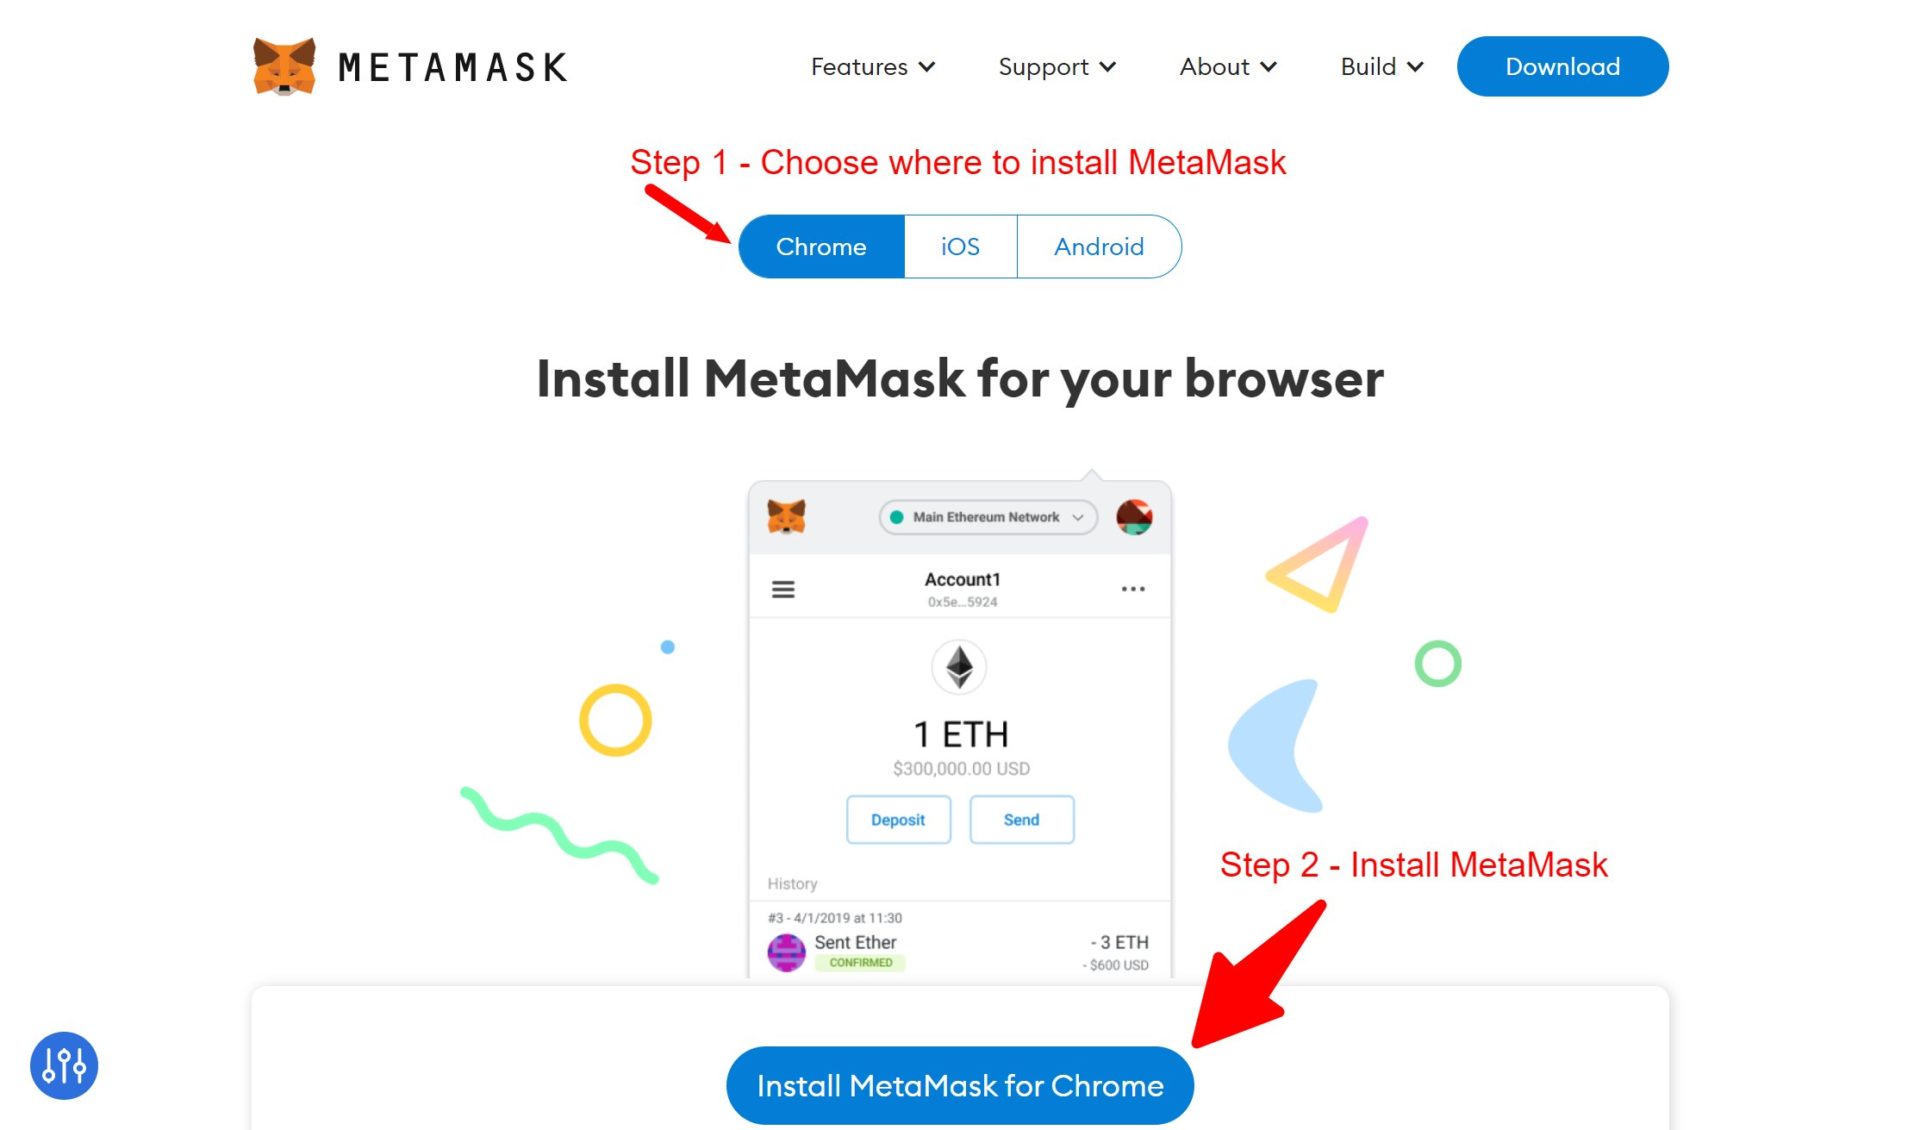
Choose your browser or phone app, and then click “Install”:
Step 4
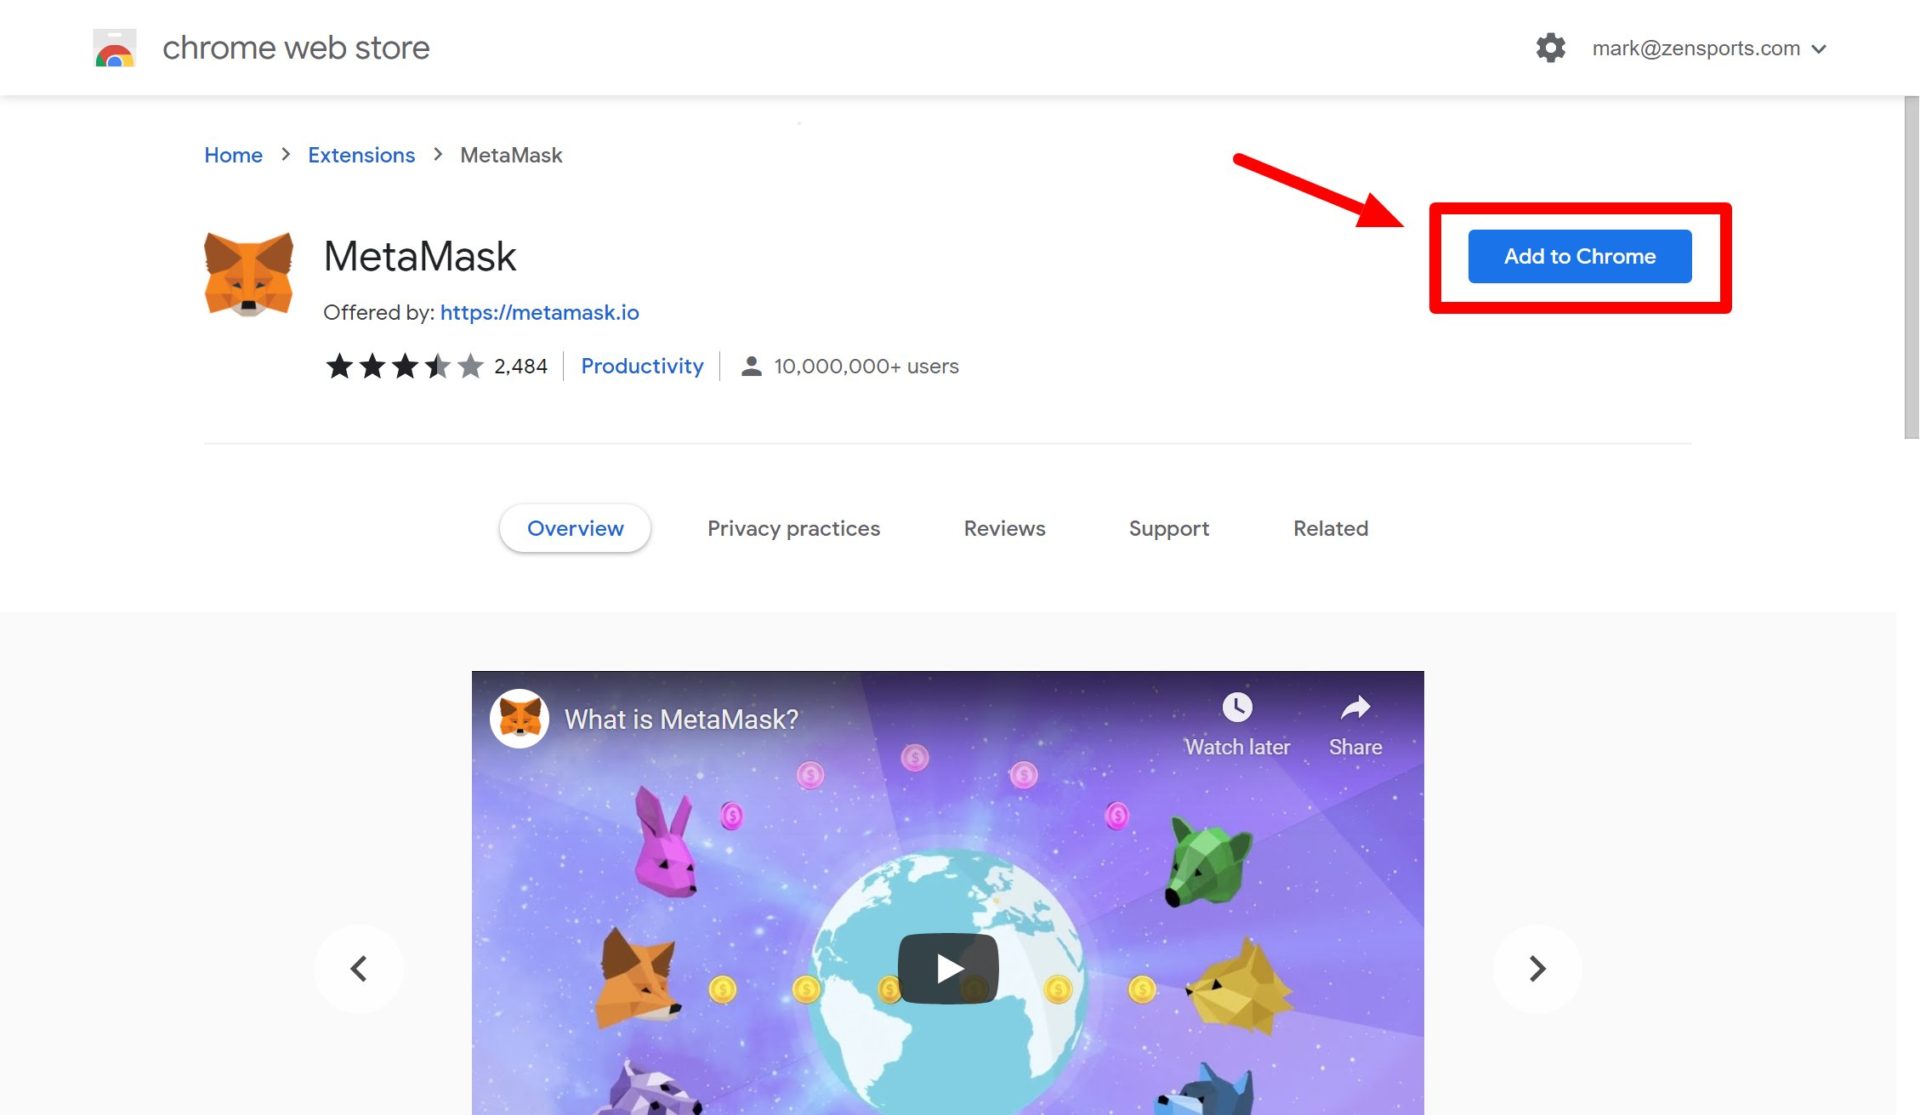
From the Chrome Web Store, click “Add to Chrome”:
Step 5
Click “Add Extension” in the Chrome pop up.
Step 6
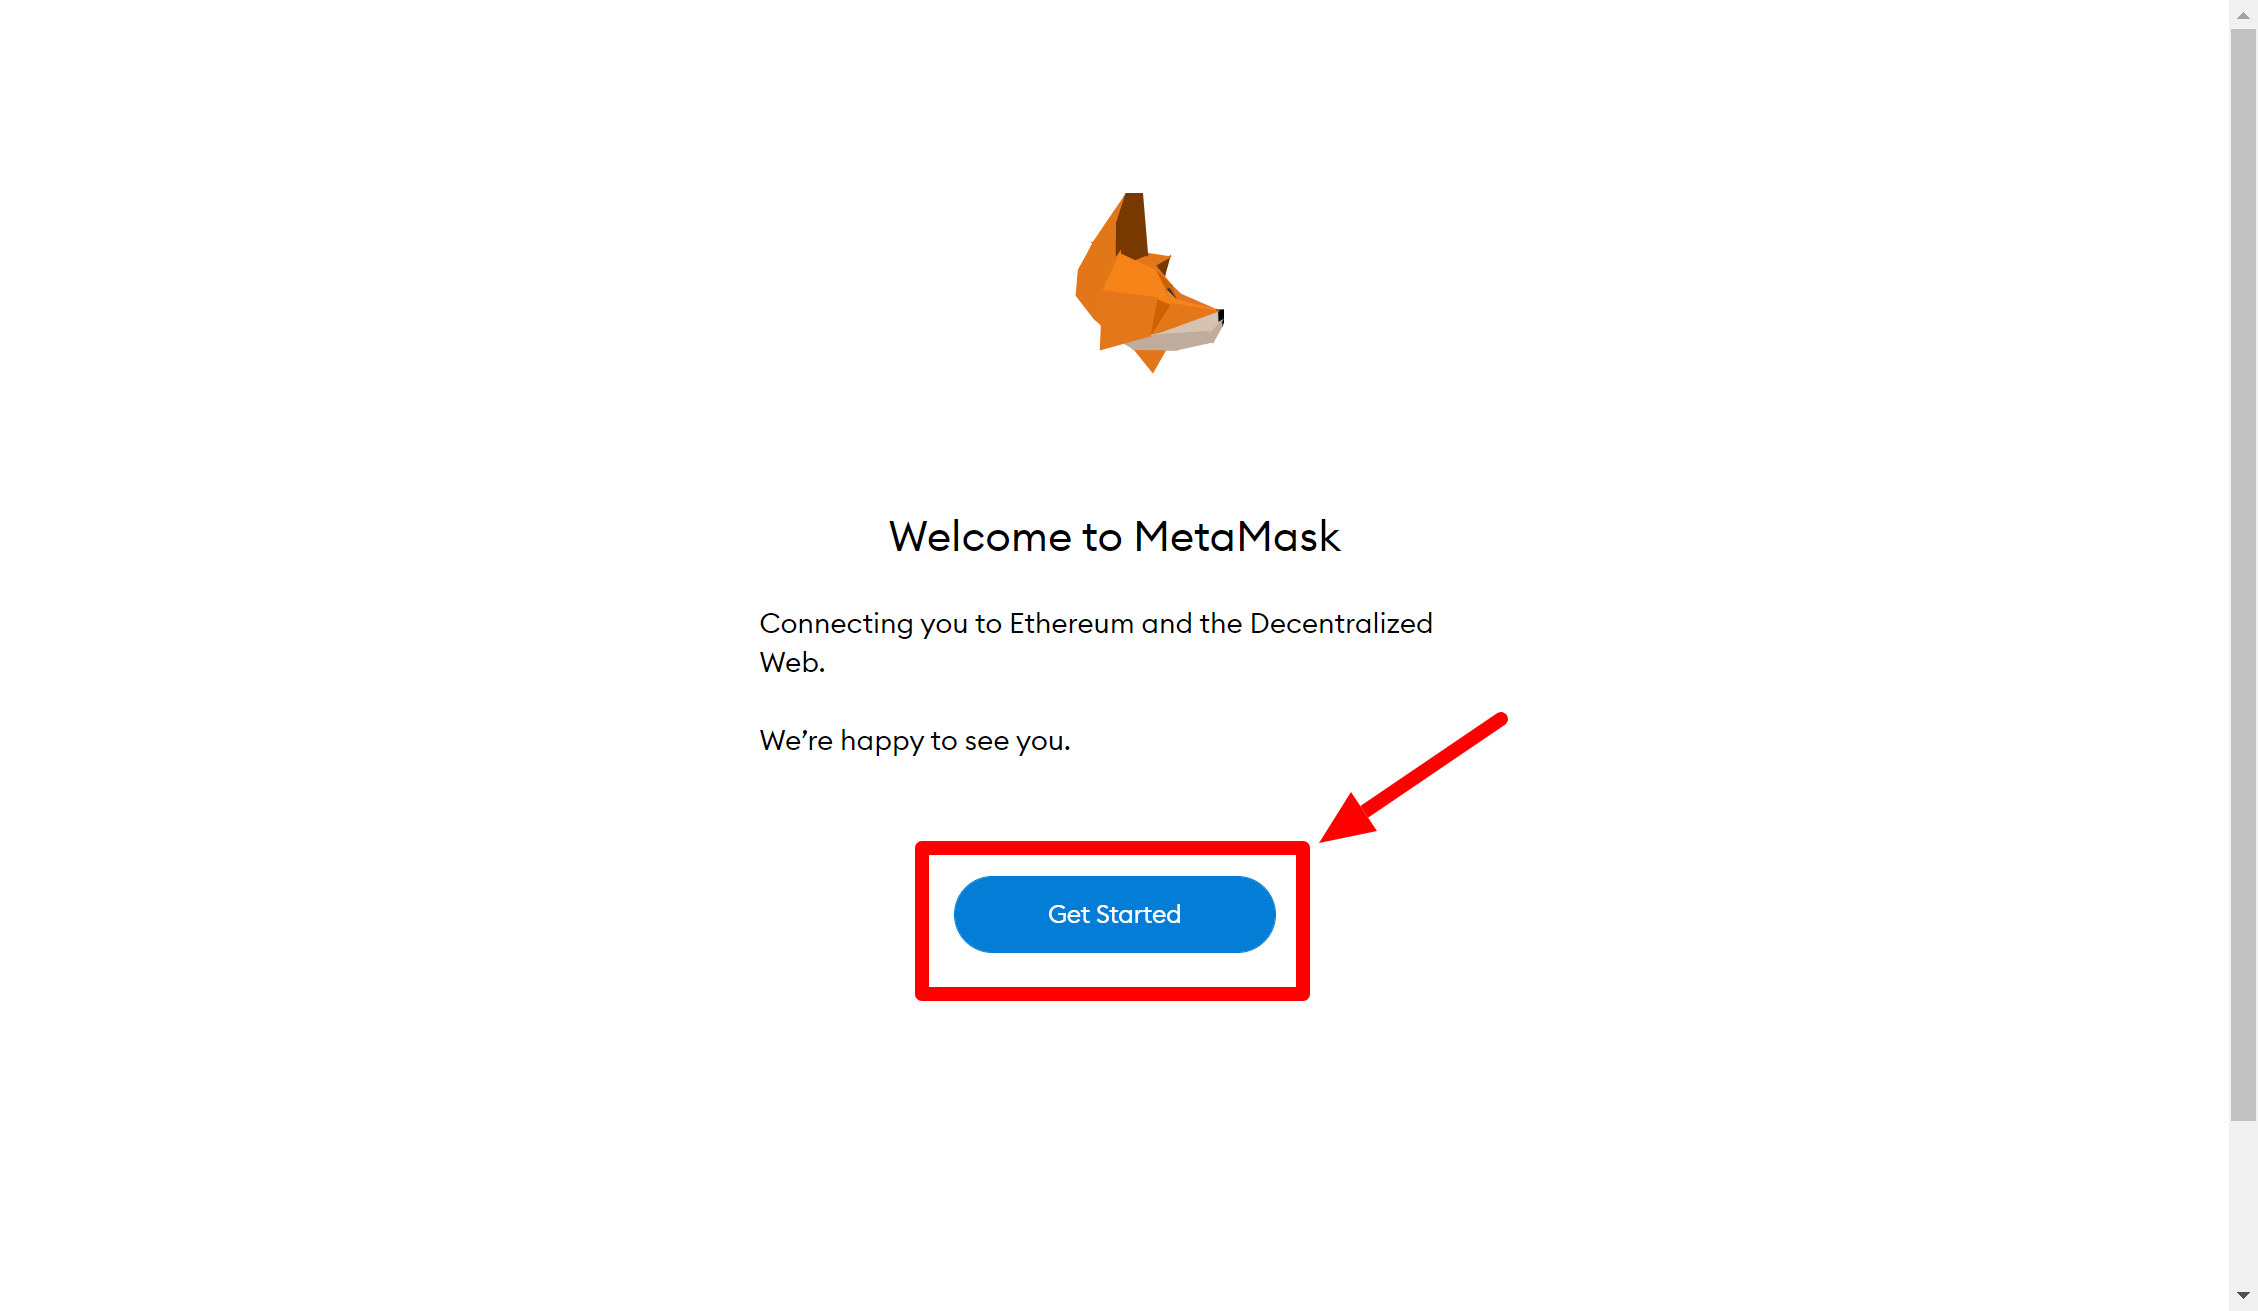
MetaMask has now been added to your Chrome browser. A new tab should open up in your browser. Click “Get Started” (you can find the MetaMask wallet in your stored browser extensions at any time):
Step 7
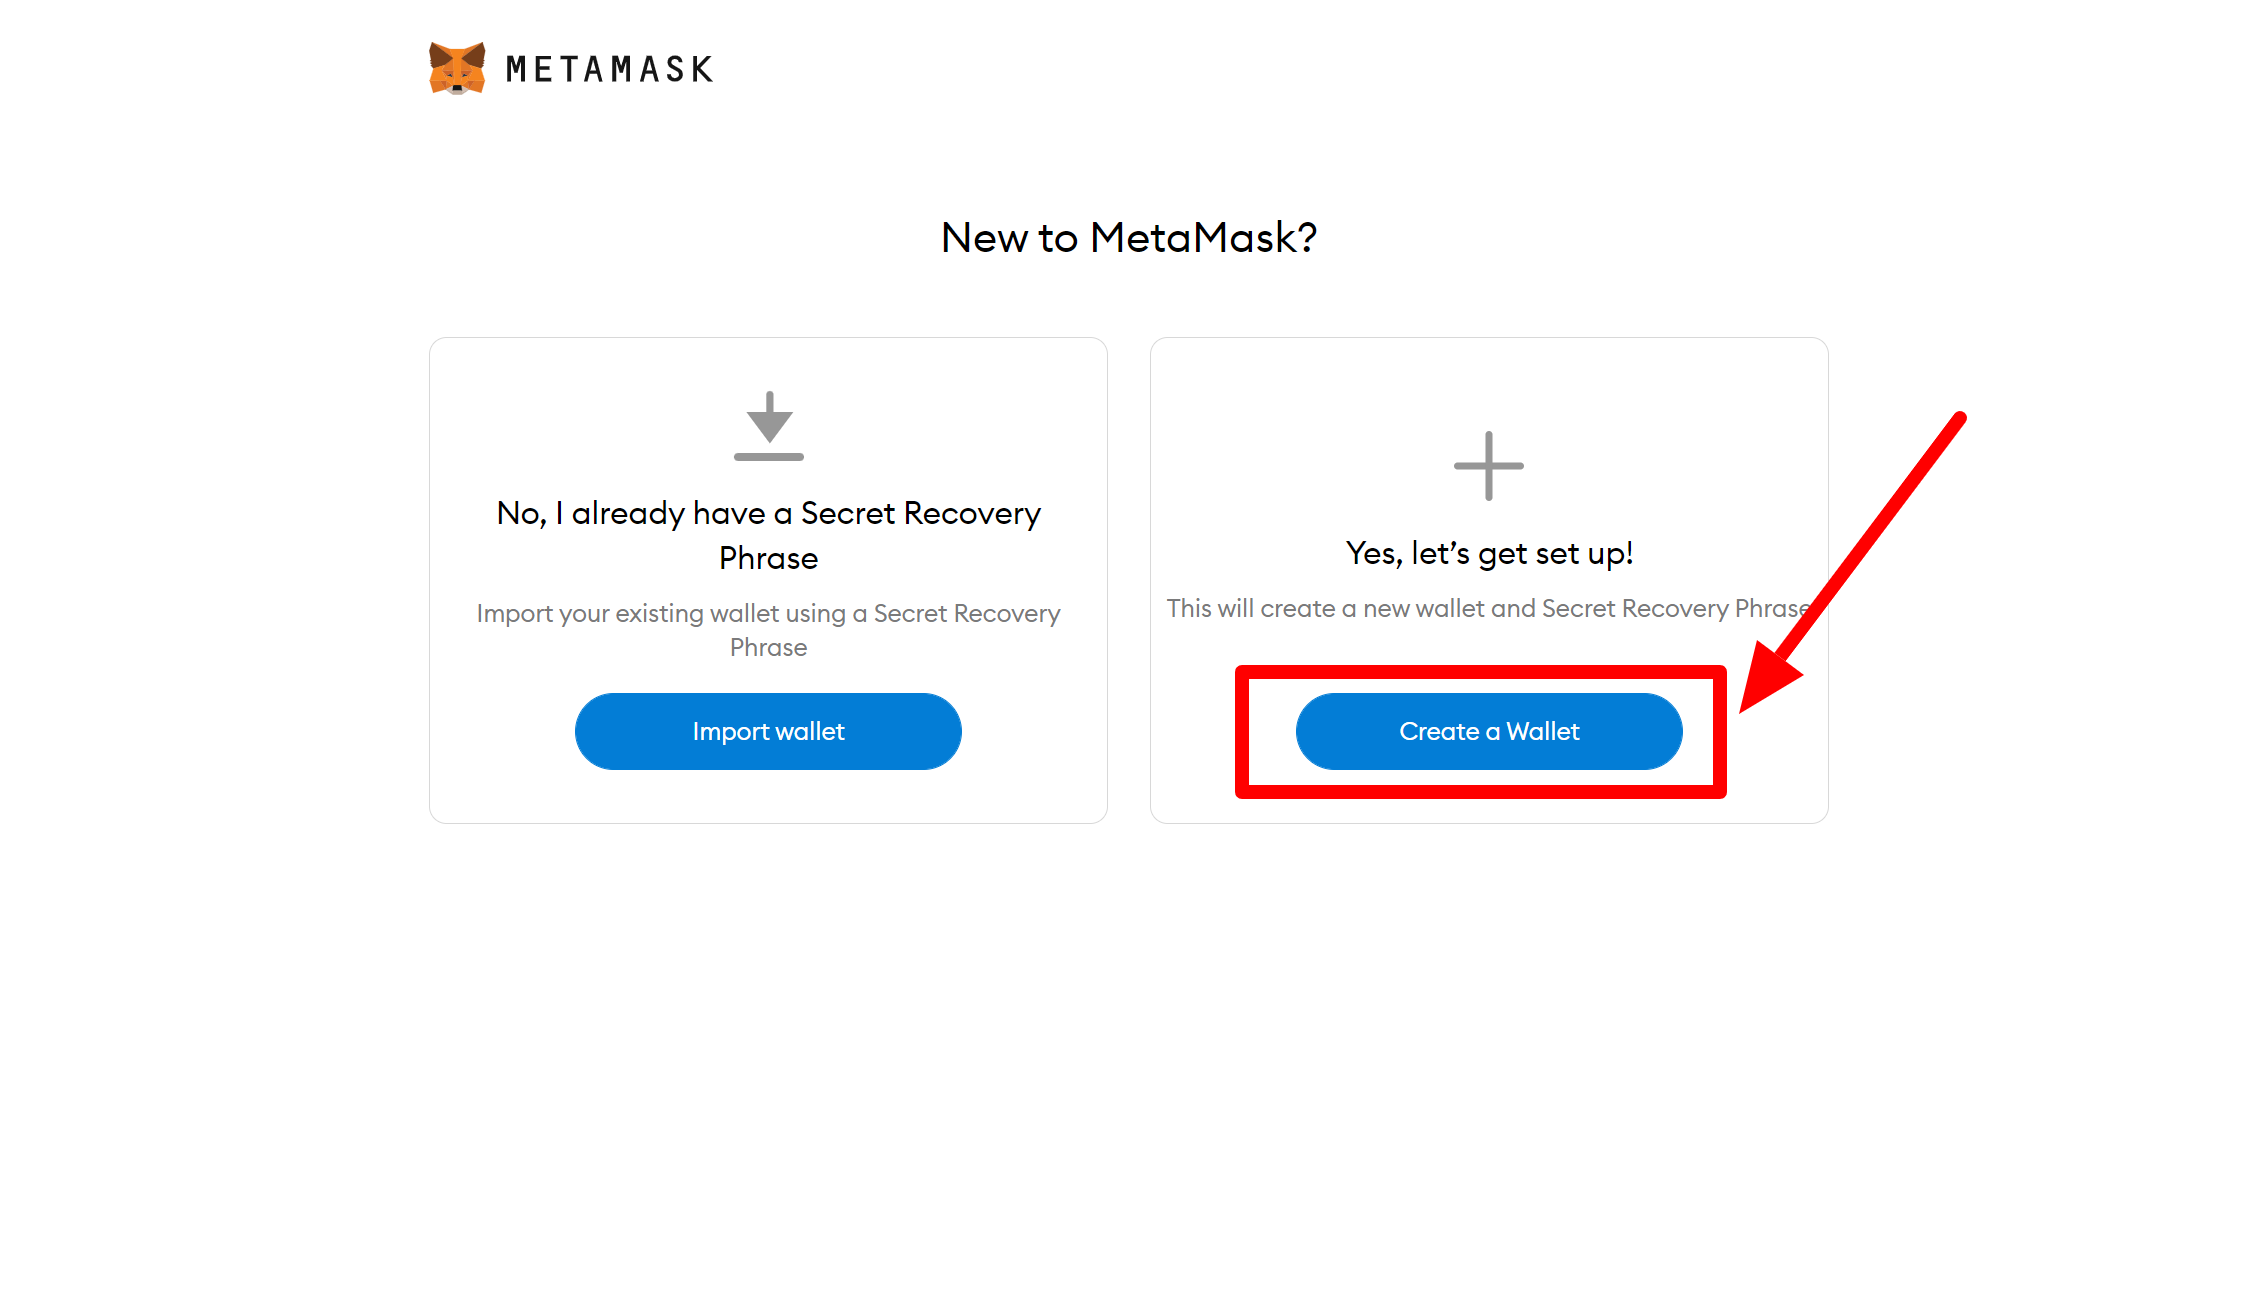
Choose “Create a Wallet”:
Step 8
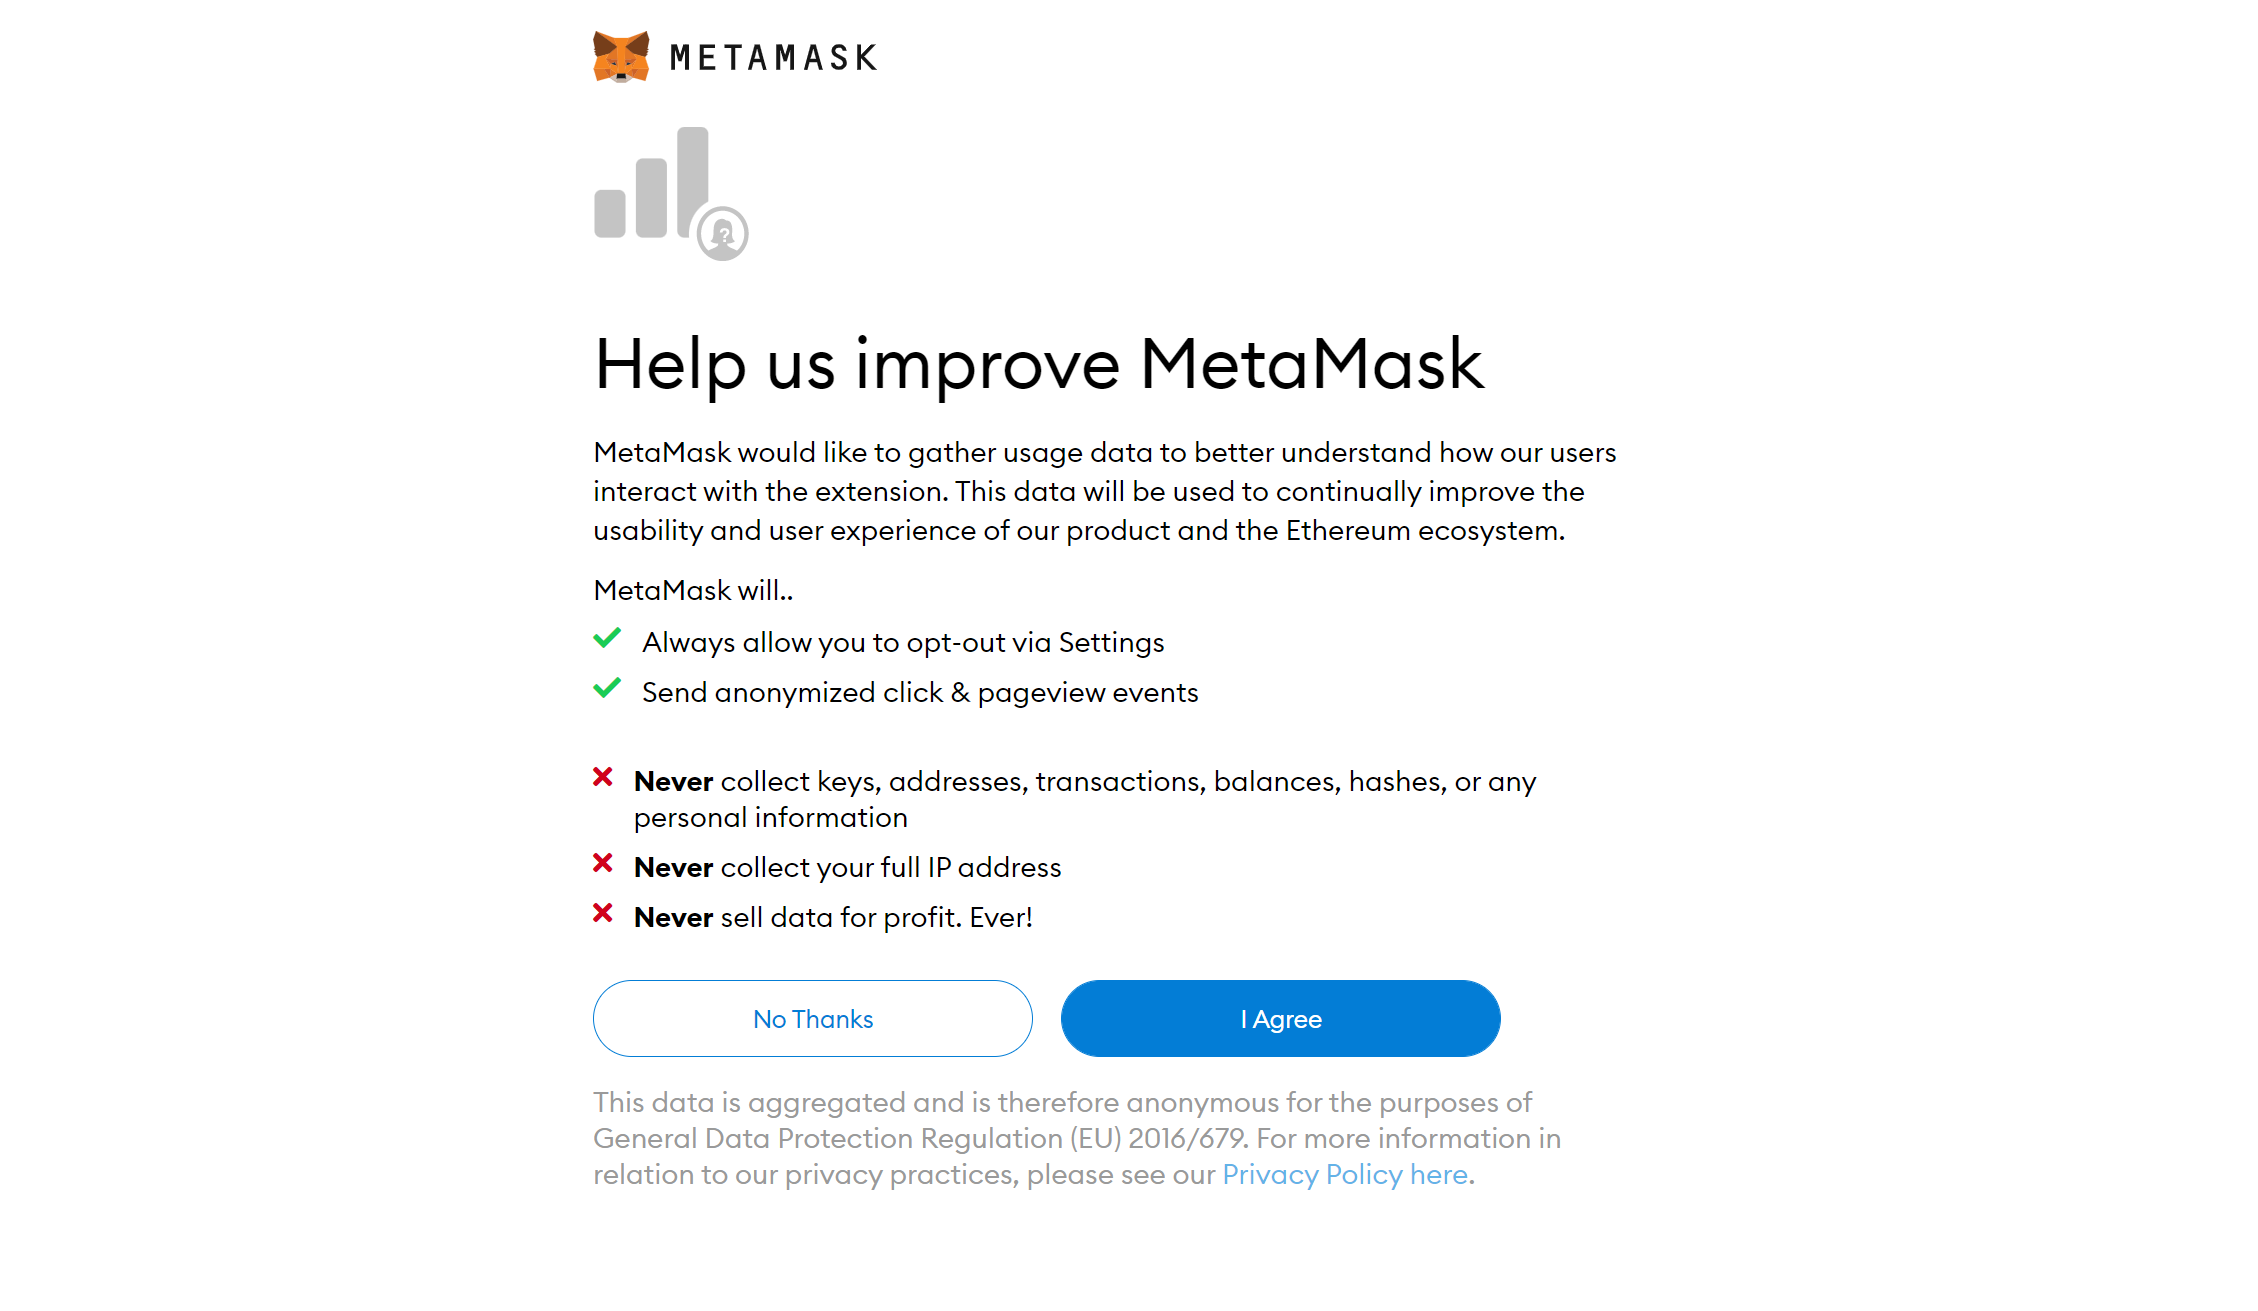
Choose whether you want to opt in or not to MetaMask gathering your usage data:
Step 9
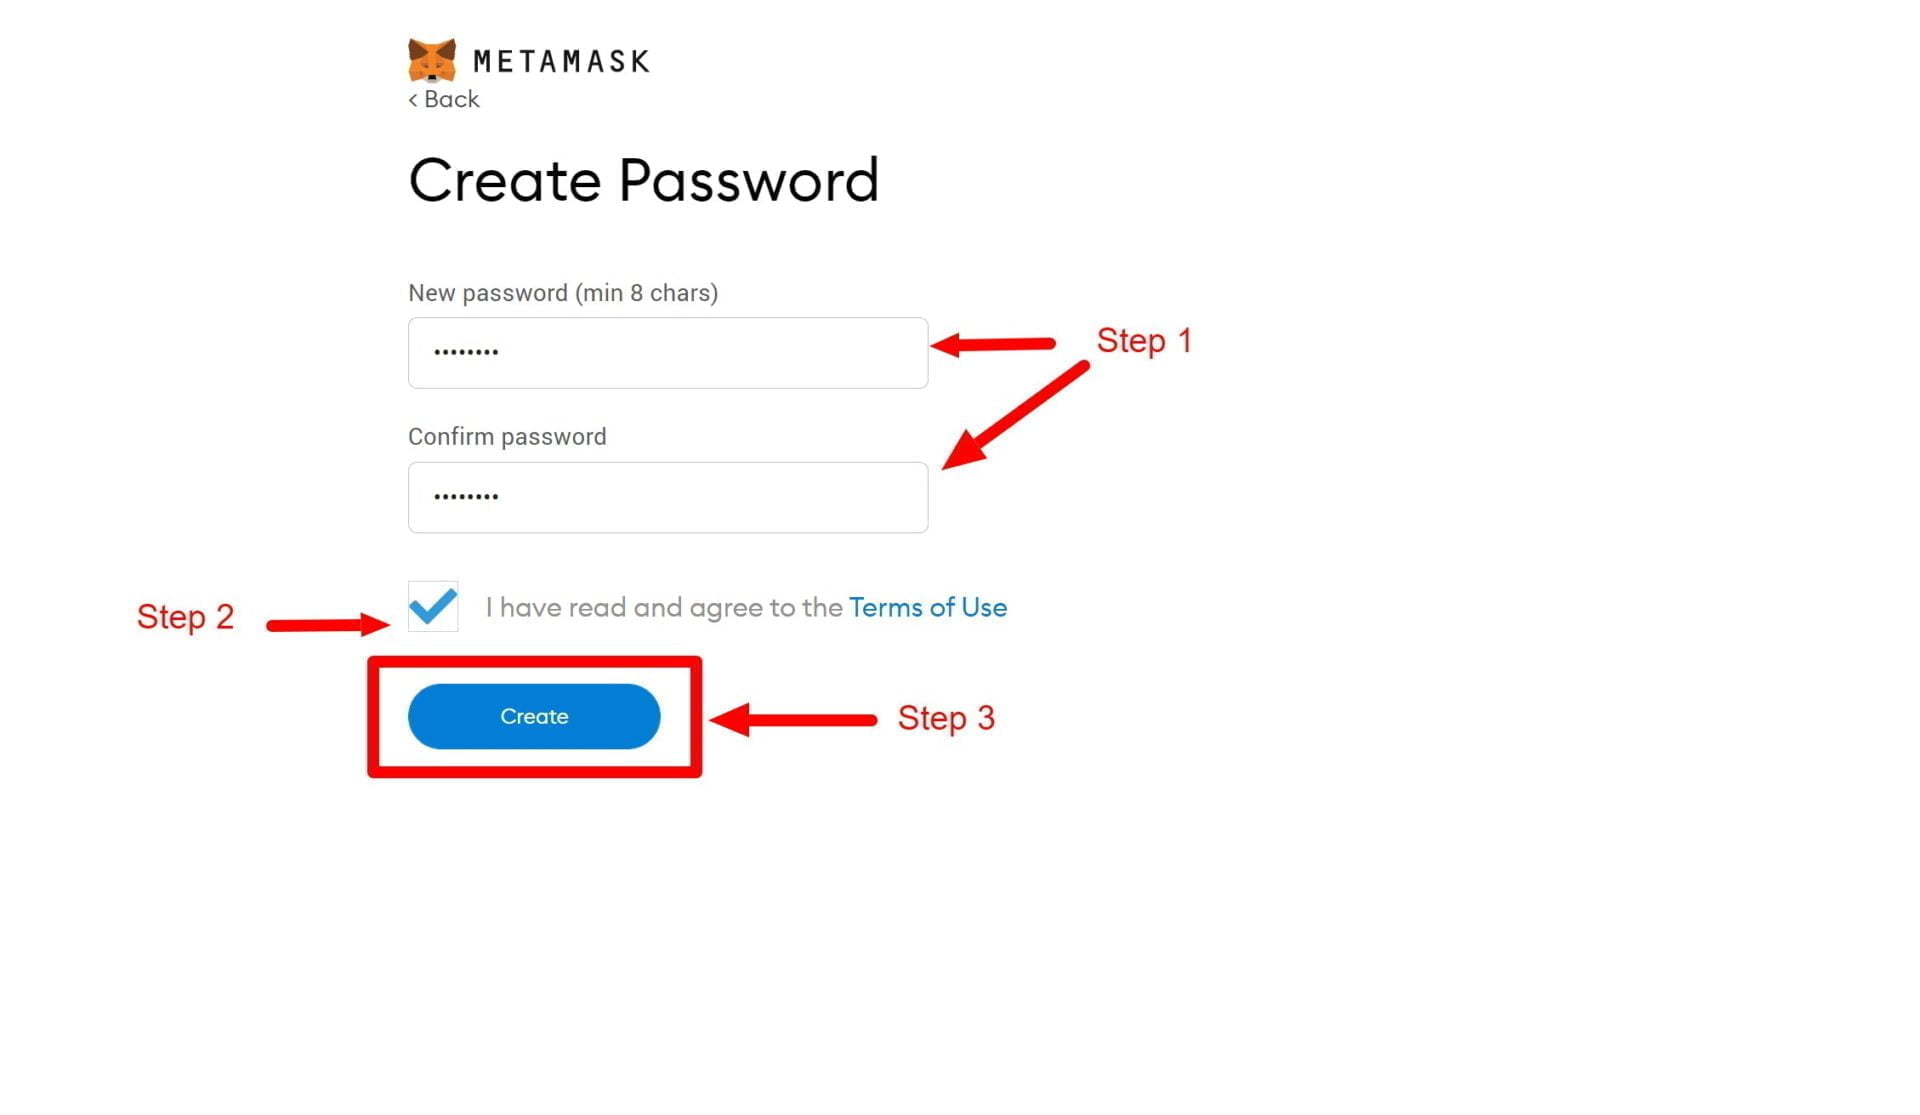
Enter in a strong password and click “Create”:
Step 10
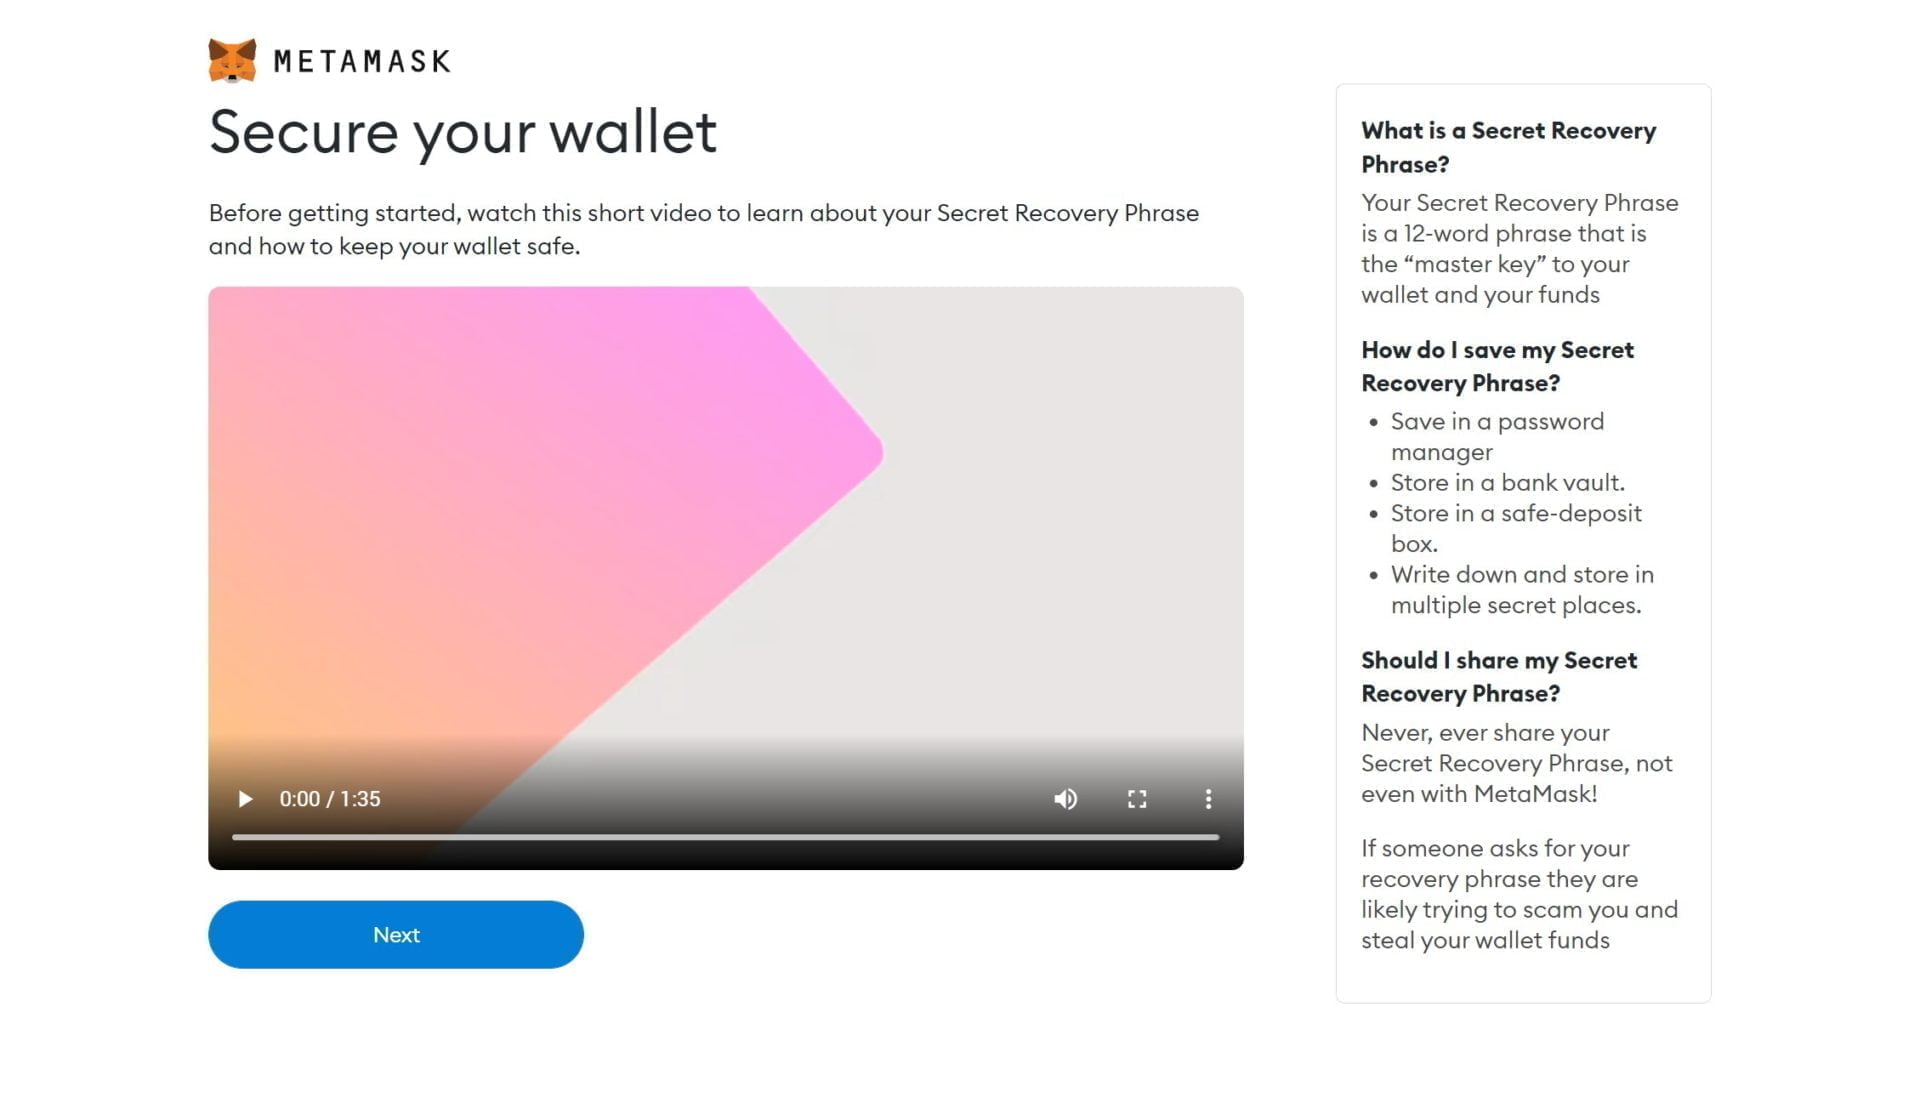
Watch the video on securing your wallet and then click “Next”:
Step 11
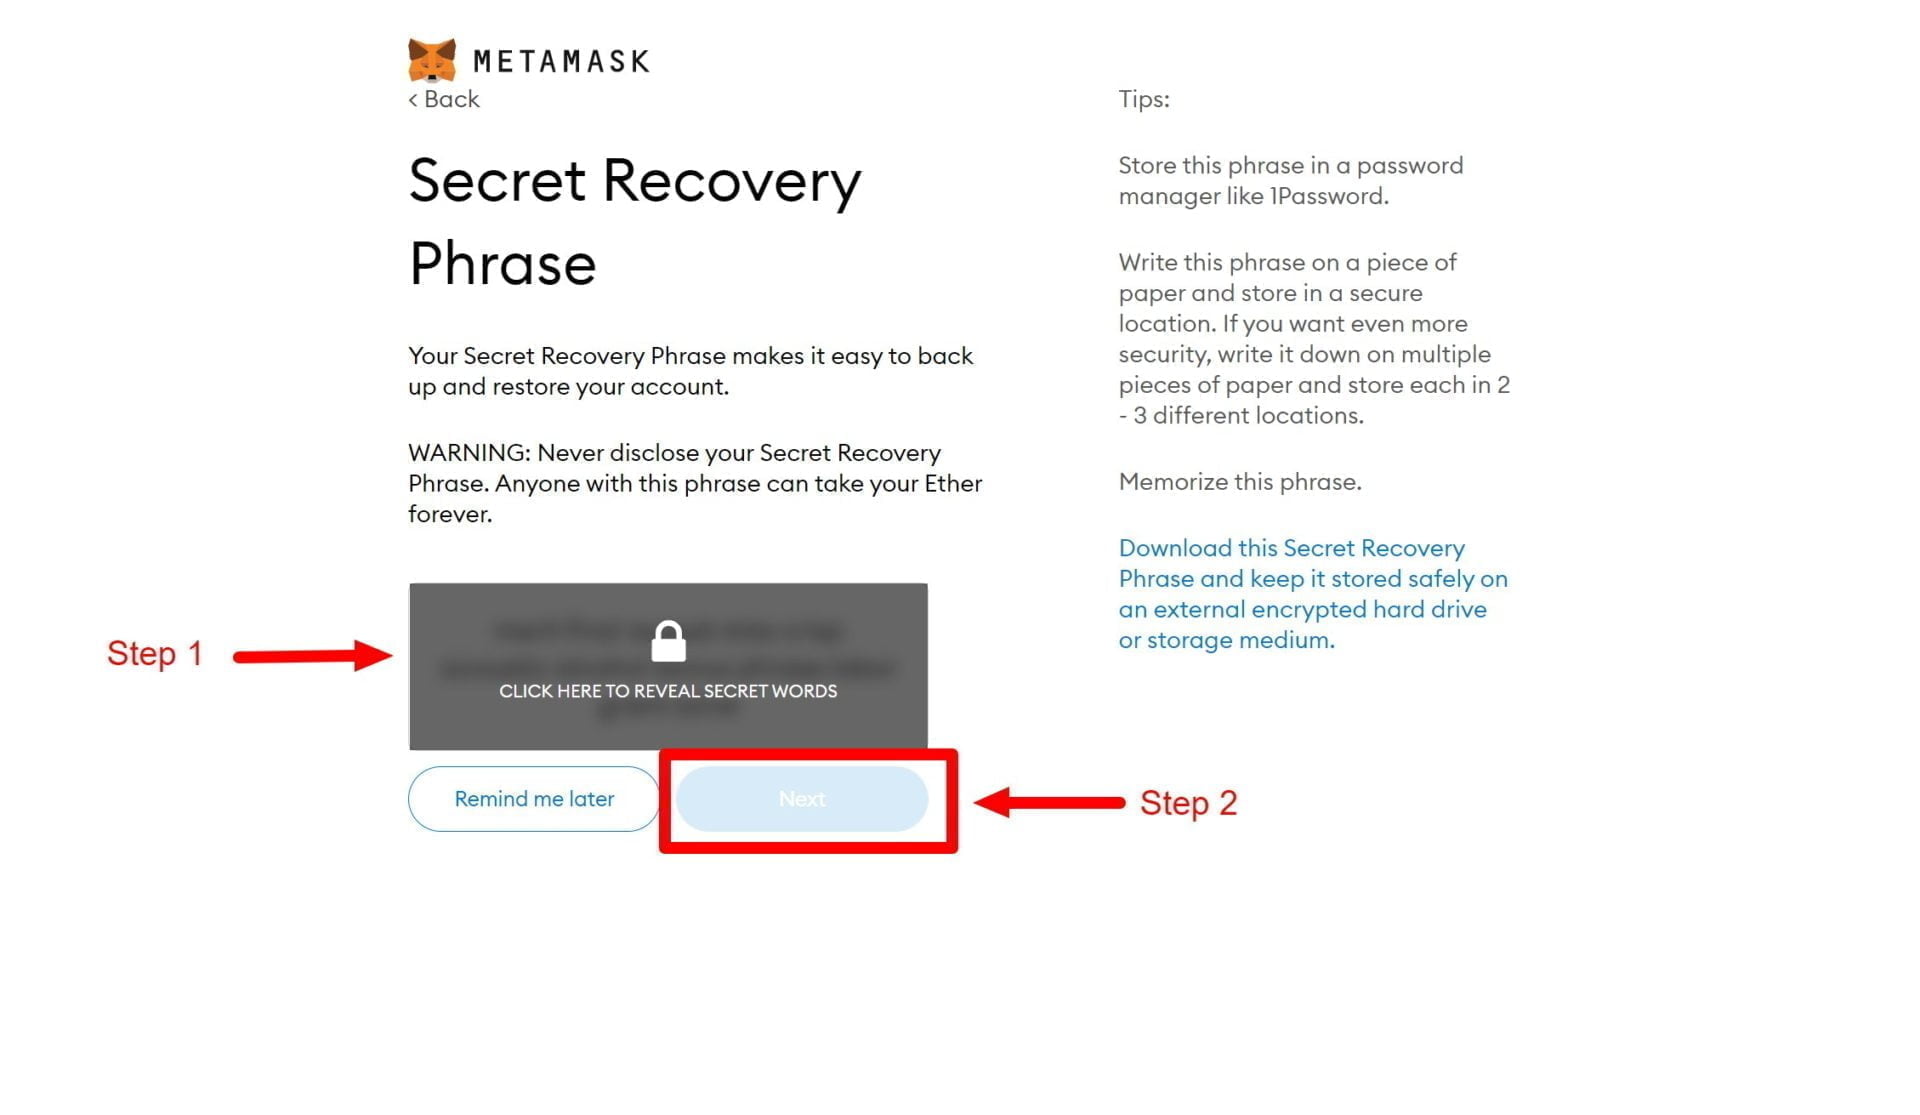
Click the lock button to reveal your secret phrase and then click “Next”:
Step 12
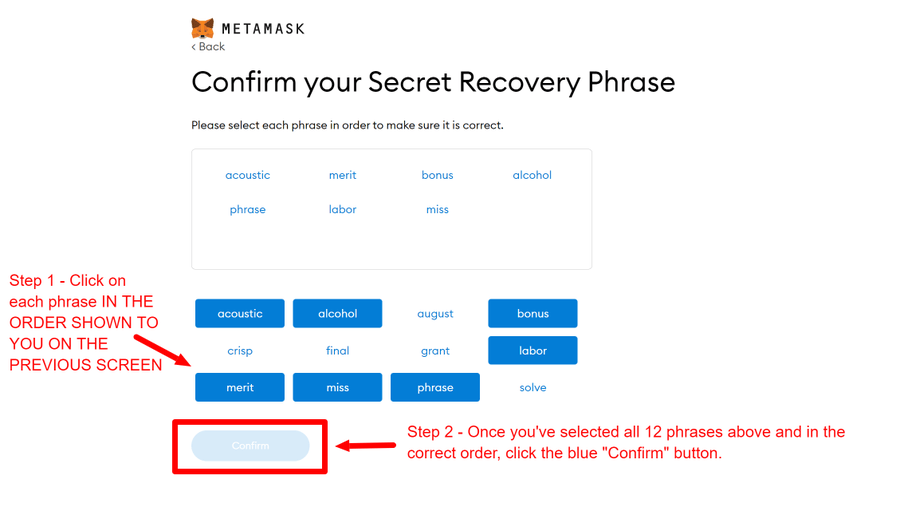
Confirm your Secret Recovery Phrase. NOTE: you must enter in your Secret Recovery Phrase in the order shown to you on the previous screen.
Step 13
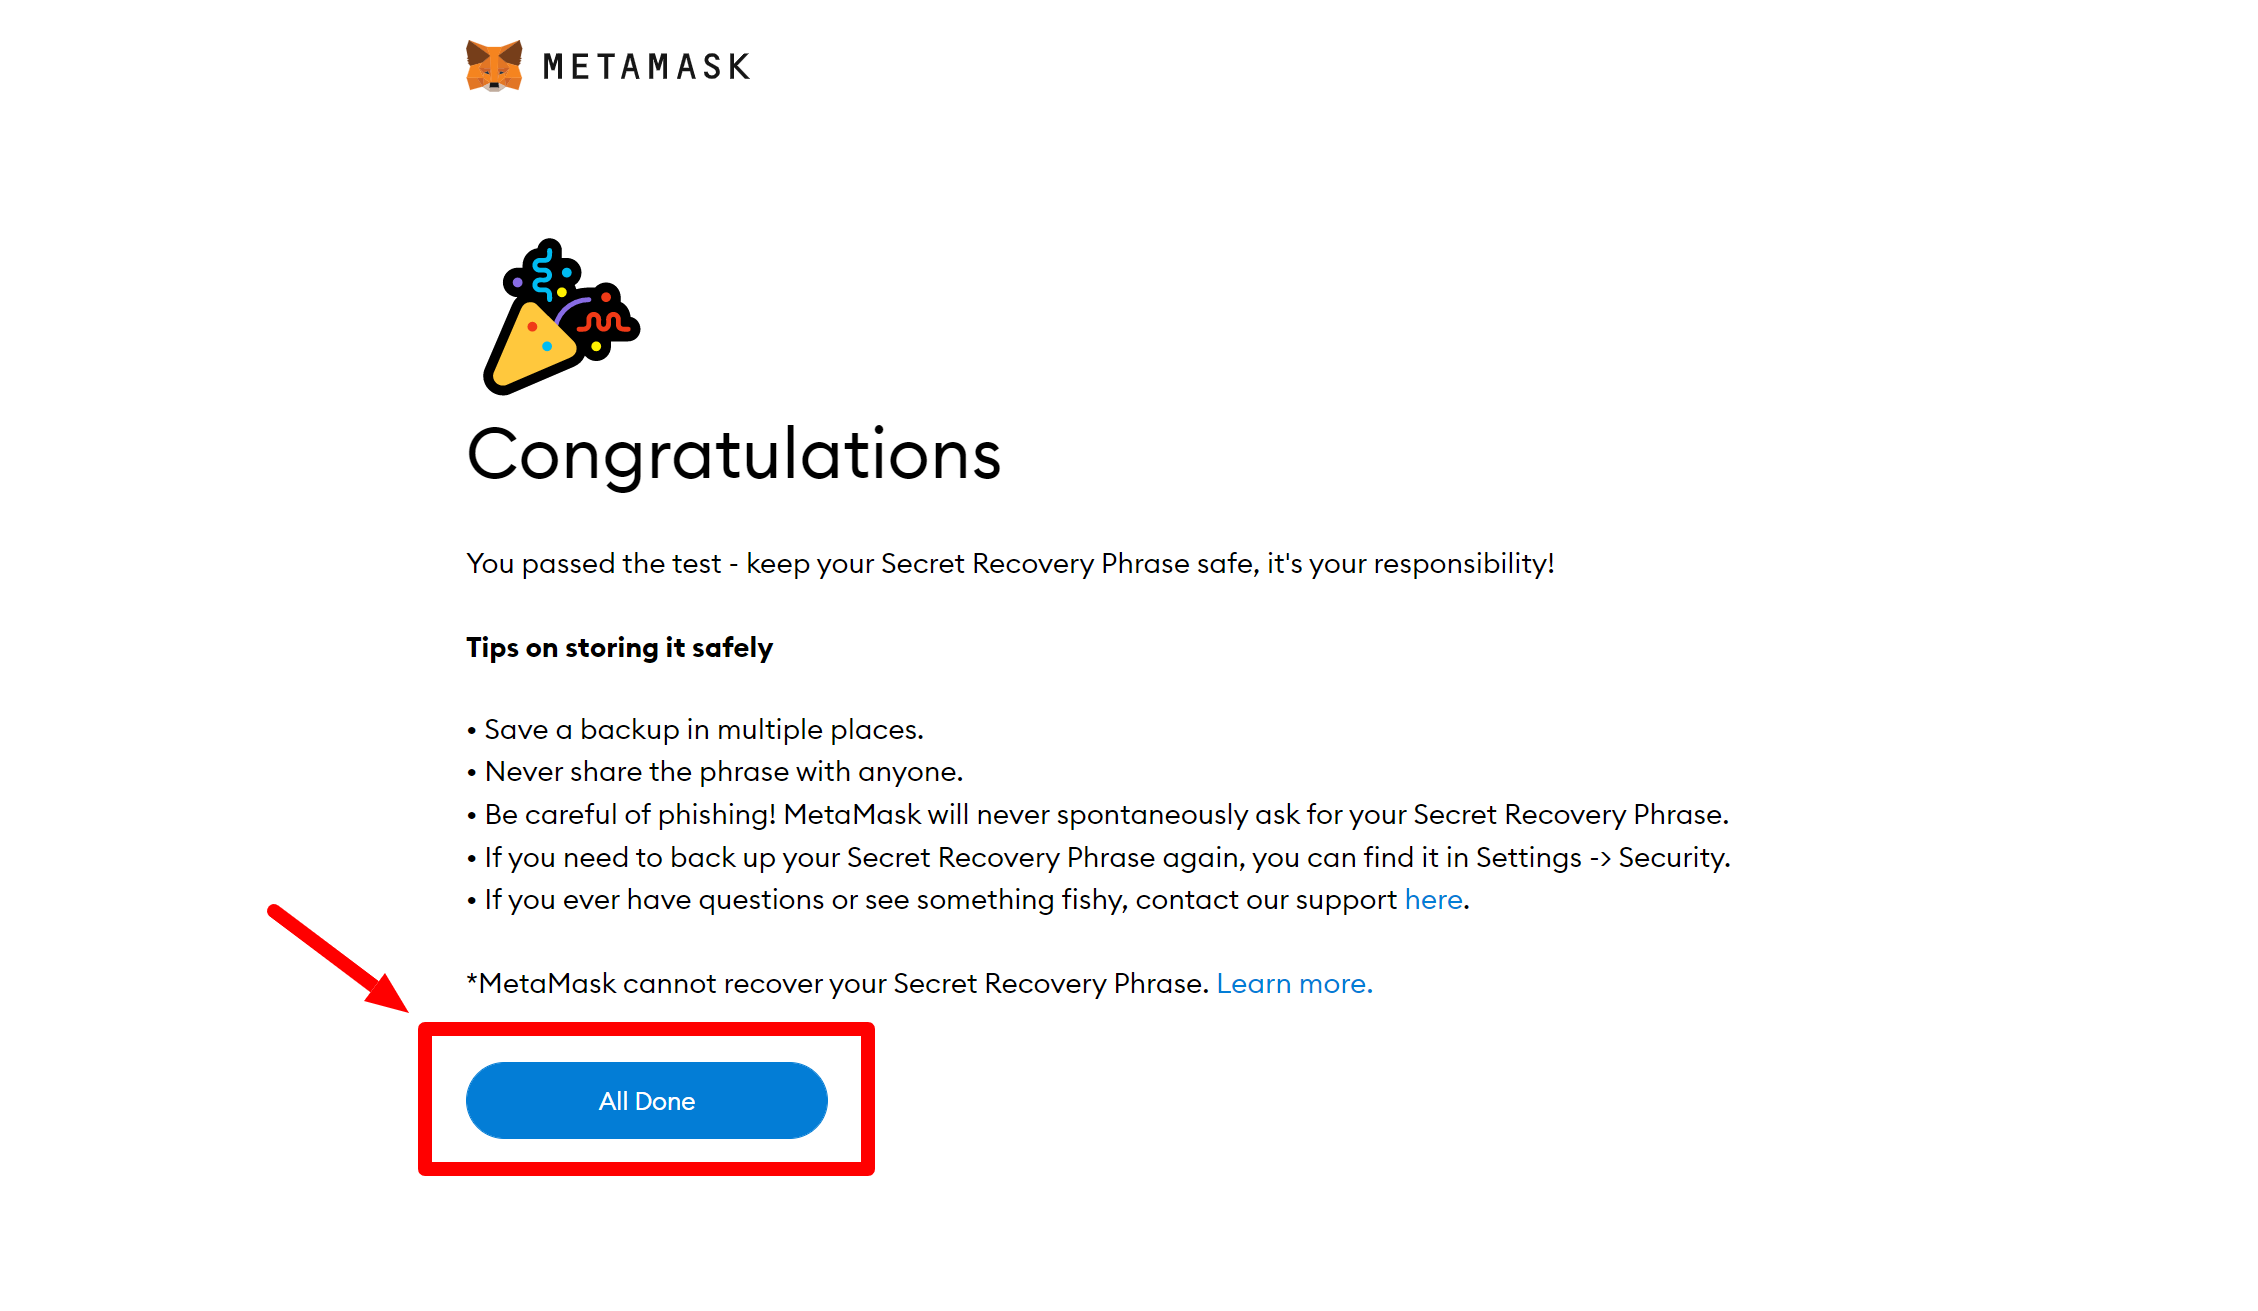
Click the “All Done” button.
Step 14
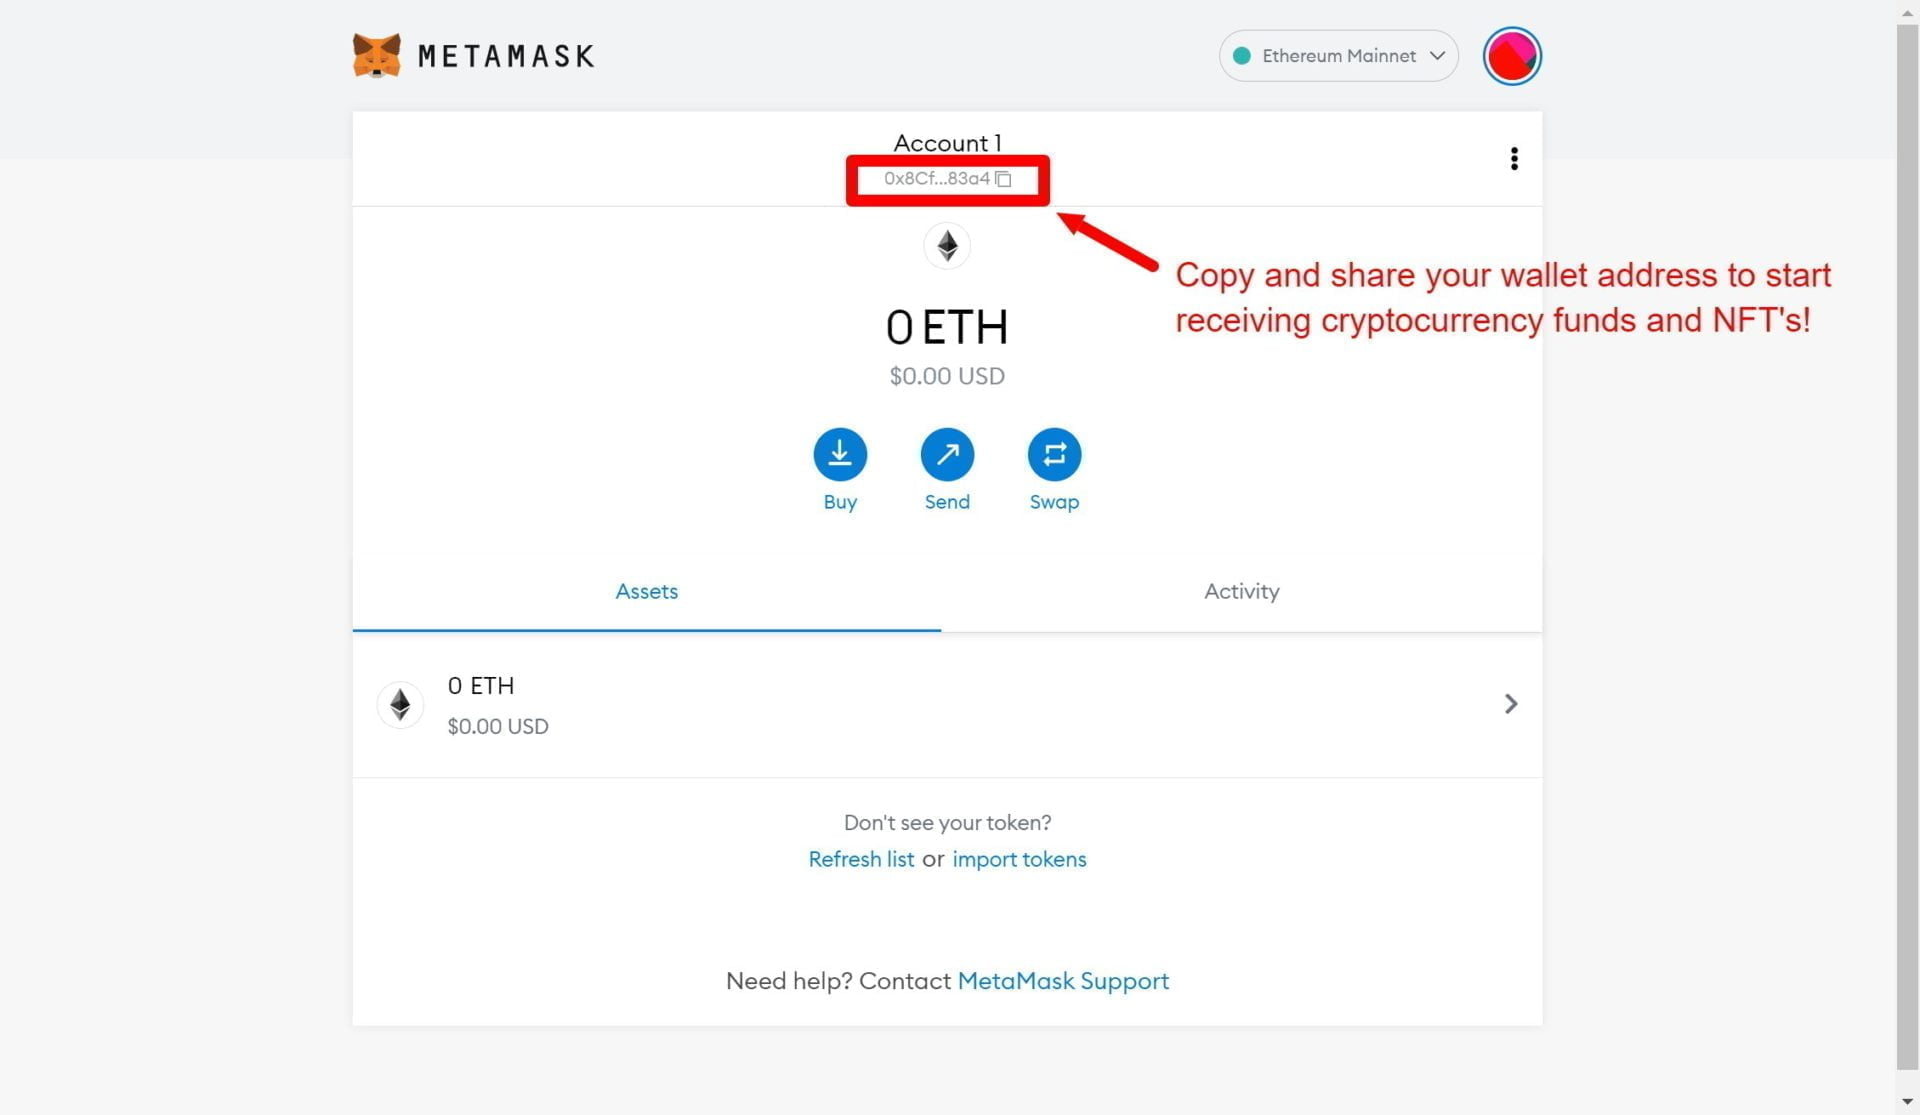
Copy and share your wallet address to start receiving cryptocurrency funds and NFT’s! 😃💰🎨
